27 Nov 2024 • 5m read • 14m video
A Guide to Snell E1 and S7 Motorcycle Intercoms

Vanessa Ruck Author
As an enthusiastic motorcyclist, I understand the value of staying connected on the open road. Intercom systems provide a great way to enhance the riding experience by enabling communication with other riders in your group or a pillion passenger. In this article, I'll be providing an overview of two motorcycle intercom options from Snell and XLMOTO - the E1 and S7 models.
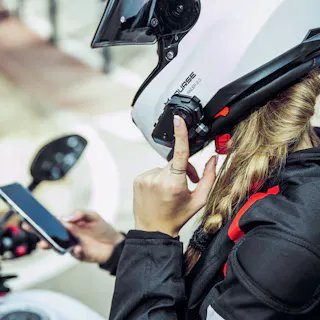
The Snell E1 is a more advanced intercom designed for seamlessly connecting with up to 4 riders within a 500 meter range. With up to 10 hours of battery life and a completely waterproof design, this rugged intercom is ready for adventure.
The Snell S7 offers a more affordable option focused on rider-pillion connections rather than multiple bike communication. With 8 hours of usage battery life and everything needed for installation included, it packs great value.
I'll be highlighting the key features and installation process for both intercoms so you can determine which Snell model best fits your motorcycling needs and style.
Key Features of the Snell E1 Intercom
The Snell E1 intercom unit enables riders to connect with up to 4 other riders within a 500 meter range. This makes it a great option for group rides where multiple riders want to communicate. The E1 is fully waterproof, meaning it can withstand anything the road throws your way. With up to 10 hours of battery life and 15 days on standby, you can rely on this intercom for the duration of even long-distance touring.
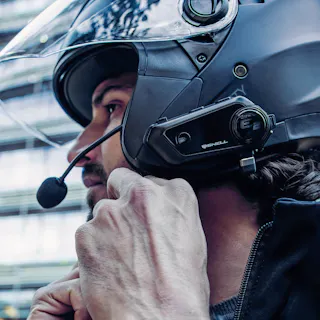
Inside the Snell E1 box, you'll find the intercom unit itself featuring easy-to-use controls optimized for gloved hands. It comes with a microphone and cable to plug into the unit. You have the choice of a stick-in microphone for full face helmets or a boom microphone for open face helmets. The set also includes 40mm speakers and cables to install inside your helmet lining. With all the installation accessories included, getting set up is quick and easy.
Installing the Snell E1 Intercom
Installing the Snell E1 intercom unit is straightforward with the components included in the box.
Prepare the Helmet: Clean the areas where the components will be attached using alcohol or lens cleaning wipes for better adhesion.
Installing the speakers: Attach the 3M velcro pads inside the helmet to hold the speakers and microphone. When placing the velcro pads and speakers, put them near your ears for optimal sound quality. If unsure of exact placement, put the helmet on and feel where your ears are inside.
Route the wires: Route the thin cables across the top interior of the helmet, securing any loose wiring behind the removable padding. This prevents any slack or loose cables from being bothersome while riding.
Install the microphone: For the microphone, place the velcro as close to your mouth as possible inside the helmet for clear voice pickup. Like the speakers, thread the microphone wiring behind the removable interior padding.
Mount the intercom bracket: Finally, use the 3M stickers to adhere the sturdy intercom mount bracket on the side of the helmet. For easy access while riding, consider placing the mount on the left side if you will operate it with your left hand. Take care to position the mount where it does not negatively impact the helmet's aerodynamic stability.
Snell S7 Intercom overview
The Snell S7 is a more basic intercom model, better suited for solo riders or riders with a pillion passenger. Unlike the E1, the S7 intercom connectivity is via a wire rather than Bluetooth. The box includes a cable to connect the rider to the pillion for two-rider communications up to 10 meters apart. With 8 hours of battery life on a single charge, the S7 should get most riders through a good ride before needing to recharge. The 120 hours of standby time means you can let it sit for about 5 days between rides without losing the charge. Inside the S7 box, you’ll find the main unit, two speakers for installing inside your helmet, the rider-pillion connection cable, a boom microphone, USB charging cable, velcro pads for mounting, and a user guide with instructions.
While more basic in terms of features, the S7 still allows you to listen to music, hear turn-by-turn navigation prompts, and talk to your passenger while out on the roads.
Installing the Snell S7 Intercom
Installing the Snell S7 intercom into an open-face helmet requires a few key steps.
Prepare the Helmet: Clean the areas where the components will be attached using alcohol or lens cleaning wipes for better adhesion.
Installing the speakers: Attach the included velcro pads inside the helmet to hold the speakers in place near your ears. Make sure to check where your ears sit within the helmet to position the pads correctly. Route any loose wires and cables behind the helmet padding to keep them secure and out of the way.
Mount the intercom bracket: Use more velcro pieces to attach the actual intercom unit itself to the side of the helmet. For optimal control, mount it on the left-hand side if possible. Secure any dangling wires to eliminate slack.
Install the microphone: The open face helmet requires securing the included boom microphone near your mouth to pick up voice audio clearly. Place a small velcro tab on the helmet and attach the microphone firmly. Route this wire behind the padding as well.
Route the wires: A key aspect of the S7 model is its connectivity between rider and pillion via a wire. Use the included stretchy cable to connect the rider intercom to the pillion's headset. This allows both riders to communicate clearly over longer distances compared to Bluetooth alone.
FAQs
Concluding with the key features of both models
Both the Snell E1 and S7 intercoms share some handy features that make them suitable options for motorcyclists.
Firstly, they are both waterproof, allowing you to use them in all weather conditions without worrying about damage from the elements. This is crucial for motorcycle riders who can't avoid getting caught in the rain!
When it comes to battery life, the E1 gives you a bit more usage - about 10 hours, compared to 8 with the S7. However, the E1 has a longer standby time at 15 days versus just about 5 days for the S1.
Another great aspect of these intercoms is that all necessary accessories are included right in the box. This means you get the unit itself, speakers, microphones, charging cables, and mounting equipment. No need to purchase additional parts separately!
Finally, both units utilize Bluetooth 4.0 to enable wireless connectivity. This allows you to pair them with Bluetooth-enabled devices like smartphones for music, navigation, and taking calls while riding.
Editors Note: The Snell E-1 mentioned in the video is no longer available, instead you can find the new version Snell E-2 on site. The same applies for the Snell S-7, the upgraded version Snell S-8 can be found on site.