23 Jan 2025 • 5m read • 20m video
How to replace your dirt bike brake disc

Charlie Frost Author
The braking system is the heartbeat of your dirt bike's safety features, making it crucial to understand the signs of wear and the steps required for replacement. From the initial removal of the front and rear wheels to the precise installation of a new brake disk, this short guide is your go-to manual for exactly that!
I'll take you through each phase of the process, providing detailed instructions and tips I've gathered from years of riding and maintenance experience. Whether you're a seasoned rider familiar with the nuances of your bike or a newcomer eager to learn the ropes of dirt bike care, this guide is tailored to help you confidently tackle the task of replacing your brake disk. So, let's gear up and ensure your dirt bike continues to perform at its best!
Step I. Removing the Front Wheel
The first step in replacing the front brake disc is removing the front wheel. You'll need a 10mm socket to loosen the locking nuts on one side of the wheel, as well as a 24mm socket to remove the wheel nut.
Start by loosening the two locking nuts on one side in order to grip the spindle so it doesn't spin when removing the wheel nut.
Then, completely remove the wheel nut and set it aside so it doesn't get lost.
Next, loosen the two locking nuts on the other side in order to release the spindle. Sometimes you may need to tap the end of the socket to pull the spindle out of the forks.
Finally, remove the front wheel. Be sure to put the spindle back through the fork so it doesn't get misplaced while working.
Taking the time to properly remove the front wheel makes it much easier to access and replace the worn brake disc.
Step II. Removing the Front Brake Disc and Install the New Brake Disc
To remove the front brake disc, the first step is to knock out the wheel spacer allowing access to the disc mounting bolts. You'll need an 8mm socket to loosen the 6 bolts holding the disc in place. It's best to loosen the bolts one by one, leaving the top bolt in last so the disc doesn't fall out.
In order to reinstall the new disc you basically revert the process. If your bolts are fine they can be reused. Make sure to check the thread lock and add some new if you feel uncertain. Place the bolts back by hand first and then use the socket to strengthen the bolts. Best is to lock them diagonally one by one.
I've outlined it in a step by step process for the rear wheel that you can also follow for the front wheel.
Step III. Reinstalling the Front Wheel and Disc
Now we can reinstall the front wheel and disc.
Start by cleaning the spindle and lower fork legs with a rag and spray lubricant. This allows everything to slide smoothly back into place.
Next, use a flathead screwdriver to open up the brake pads, inserting it between the pads and turning to provide more space.
With the pads open, slide the front wheel into place, carefully lining up the disc into the pads. Ensure the discard spacer sits flush as you slide the wheel into the forks.
Step IV. Removing the Rear Wheel
Moving on to the rear wheel now. Obviously removing the rear wheel is the first step in replacing the rear brake disc.
Start by opening the brake pads by pushing your knee against the caliper. This will spread the pads apart, allowing more room to work when you go to reinstall the wheel.
Next, remove the wheel spindle completely by sliding it out with your thumb if the bike is maintained properly.
Don't forget to also remove the chain from the rear sprocket.
Step V. Removing the Rear Brake Disc
To remove the rear brake disc, you will need an 8mm socket and simply follow the next steps:
Start by loosening the bolts that hold the disc in place, leaving the top bolt in so the disc doesn't fall out.
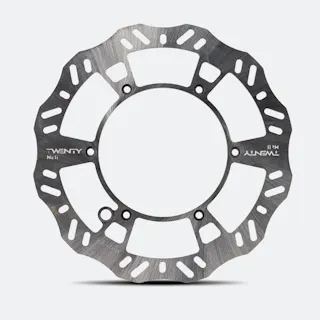
Compare the old and new disc - you can tell when it's worn as the edges will become warped.
Make sure to clean the existing bolts and the threads where they screw in to remove any dirt and old thread lock residue. Apply some new thread lock to the bolts before reusing them to make sure they stay secured.
Start installing the new disc by putting in the top bolt first and tightening it.
Then go around and put in the remaining bolts, tightening them as you go. Leave them just pinch tight until all six bolts are back in place.
Finally, go around one by one, tightening each bolt fully with the socket.
Now you have successfully replaced the rear brake disc!
Step VI. Reinstalling the Rear Wheel and Disc
To reinstall the rear wheel and new disc:
Start by cleaning the spindle to allow it to slide smoothly back through the wheel.
Then line up the wheel into the swing arm, inserting the disc into the brake pads. Slide the spindle back through the wheel and install the chain back on. Don't forget to replace the adjusting spacer as well.
Next, stick a screwdriver through the rear sprocket and pull the wheel backwards - this will pull tension on the wheel and ensure the adjusting spacer is flush when you tighten the wheel nut. Tighten the nut fully to secure the wheel.
Lastly, pump the rear brake lever a few times. This sets the caliper back into place and makes sure you don't ride off without a functioning rear brake.
Following these steps carefully will result in a properly realigned and functioning rear wheel with fresh brake disc.
As we wrap up this brief step by step guide on replacing your dirt bike's brake disk, you're now equipped with the knowledge and steps to ensure your bike remains in top-notch condition, providing the best possible performance and safety.
Remember, regular maintenance and timely replacements are key to extending the life of your dirt bike and enjoying the thrill of the ride with peace of mind. Whether you're hitting the trails or gearing up for a race, the confidence in knowing your bike is well-maintained makes all the difference.
Happy riding, and here's to many more exhilarating adventures on your dirt bike, now with a brand-new brake disk ready to take on any challenge!
FAQs
Author information
My name is Charlie Frost, and I'm no stranger to the adrenaline-fueled world of extreme enduros. Starting my journey at 19, I seamlessly blended trials and enduro racing, honing my skills through youth events and extreme races like the Tough One and Erzberg. When I'm not tearing through rugged terrain, you can often find me in front of the 24MX camera, sharing my passion and insights with fellow riders, as we delve into the exhilarating world of off-road racing.