12 May 2025 • 7m read • 19m video
How to Replace Front and Rear Brake Pads on Your Dirt Bike

Charlie Frost Author
Replacing brake pads is one of those crucial maintenance tasks that keeps your dirt bike performing at its best. While it might seem daunting at first, this job is actually quite straightforward when you follow the right steps. In this post ( and video above ) I'll walk you through replacing both rear and front brake pads, showing you exactly how to tackle this essential maintenance task. Make sure to check out the video as it’s very handy to see the process in action.
Tools and Materials Required
32mm socket
17mm socket
10mm socket
Long nose pliers
All-in-one spray lubricant
Flathead screwdriver
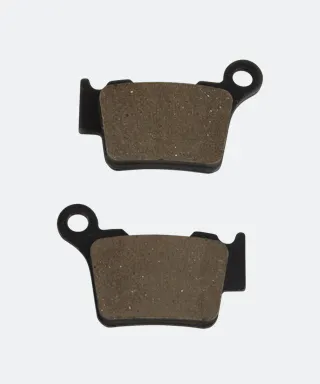
New brake pads
Before starting any work, secure your dirt bike on a stand with the rear wheel raised off the ground. This proper positioning is crucial for safe and efficient brake pad replacement.

Removing the Rear Wheel
The first step requires releasing pressure on the caliper. Push your knee against the rear caliper to create space between the brake pads - this simple technique makes wheel removal and reinstallation significantly easier. Using your 32mm socket, loosen and remove the rear wheel nut and spacer. Push the rear spindle through with your thumb, then take the chain off the sprocket. While holding the wheel with your right hand, completely remove the spindle.
Cleaning the Spindle
The rear spindle typically collects both grease and dirt, which needs proper cleaning. Here's where many riders make a mistake - using too much grease. I prefer using an all-in-one spray instead of heavy grease because excess grease attracts more dirt and makes the wheel harder to remove later. Give the spindle a thorough clean with the spray, removing all debris and old grease.
Removing the Old Brake Pads
With your long nose pliers, remove the two brake pin clips one at a time. Hold the brake pads with your thumb while pushing the pin through from the other side. Once removed, inspect inside the caliper for any dirt or grit. Check that the brake pad clip at the top is intact - this is a crucial detail many riders overlook.
Installing New Brake Pads
Start with the left side brake pad first. Before installation, apply some lubricant to the brake pin. Insert the left pad and slide the pin partially through - this holds the first pad securely in place. Then fit the right brake pad and push the pin completely through until it emerges on the other side. When replacing the clips, position them with the holes facing upward. Double-check that both pads are properly seated in the carrier.
Reinstalling the Rear Wheel
Apply a light coating of all-in-one spray to the clean spindle - don't overdo it, just enough to ensure smooth movement. Thanks to our earlier step of pressing against the caliper, you'll notice there's plenty of space between the pads for the disc to slide in easily. Line up the wheel, slide the spindle through, and reattach the chain. Place the spacer back on and secure the wheel nut.
Pro Tip: Here's a crucial step many riders forget - always pump the rear brake several times after pad replacement. Skipping this step could result in no brake response when you first ride, potentially leading to a crash, especially during wheelies.
Wheel Alignment Technique
For perfect wheel alignment, here's a technique that ensures proper positioning: Place a spanner into the sprocket and rotate the wheel backward. This pulls the wheel forward into the adjusters, guaranteeing correct positioning before final tightening. With the spanner in place, tighten the wheel nut completely. Remove the spanner, and you're done with the rear brakes.
Replacing Front Brake Pads
There are actually two methods for replacing front brake pads: removing the caliper itself using two 10mm bolts, or removing the front wheel completely. I'll show you my preferred method of removing the front wheel, which ensures the pads sit perfectly in place.
Removing the Front Wheel
For the front wheel removal, you'll need both a 10mm and a 17mm socket. There are four 10mm bolts on the fork that hold the spindle in place. The process needs to be done in a specific order to prevent binding:
First, locate the two 10mm bolts on one side of the fork.
Slacken (but don't fully remove) these two 10mm bolts - this is crucial because the wheel spindle nut won't come loose if you skip this step. It's too tight otherwise.
Once these bolts are loosened, switch to your 17mm socket.
Now you can slacken and remove the wheel spindle nut completely.
Return to your 10mm socket and loosen the remaining two 10mm bolts on the other side.
Important: Don't remove these bolts completely - just loosen them enough to create movement.
With all bolts properly loosened, you can now pull the spindle out.
This precise order of operations prevents binding and makes the wheel removal process much smoother. The key is understanding that those first two 10mm bolts must be loosened before you can even attempt to remove the wheel spindle nut with the 17mm socket.
Cleaning and Preparation
Just like with the rear wheel, you'll notice the spindle has collected grease and dirt. Clean it thoroughly using the all-in-one spray, applying just enough lubrication for smooth reinstallation. This prevents dirt accumulation while maintaining proper function. Spray it so it’s lubed up for easy replacing.
Removing Old Front Brake Pads
Using your long nose pliers, remove the brake clips from both sides of the caliper. Hold the brake pads firmly while pushing the pin through. Inspect the caliper housing for cleanliness and check that both the main clip and the top clip are intact and in good condition.
Installing New Front Brake Pads
Start by lubricating the brake pin. Insert the first pad and push the pin partially through to hold it in place. Slide in the second pad, ensuring it's properly clipped at the top. Push the pin completely through until it's flush. Here's an important detail about the clips - install them facing backward. This prevents branches or rocks from potentially knocking them out during riding.
Creating Space for the Disc
Here's where the front pad replacement differs slightly from the rear. Instead of using your knee, use a flat-head screwdriver placed between the pads. Give it a gentle twist at both top and bottom to create adequate space for the disc. This makes wheel reinstallation much easier.
Reinstalling the Front Wheel
Line up both forks and slide the wheel back into position. The spindle should slide through smoothly thanks to our earlier cleaning. Here's a crucial step that many riders miss: tighten just one of the 10mm bolts first. This secures the spindle in place before you tighten the wheel nut.
Switch to your 17mm socket and clean the wheel nut before installation - removing any dirt helps maintain proper function. Thread the wheel nut on finger-tight initially, then fully tighten it. This is where that single tight 10mm bolt proves its worth, preventing the spindle from spinning while you torque down the wheel nut.
Critical Fork Alignment
Here's where technique really matters. After tightening the wheel nut, you need to loosen that initial 10mm bolt we tightened. This might seem counterintuitive, but it's essential for proper fork alignment. When you loosen this bolt, the fork will move slightly, allowing both forks to align correctly. If you skip this step, your forks will remain pulled in and misaligned.
Final Tightening Sequence
Work from left to right, tightening all four 10mm bolts one by one. Ensure they're all properly torqued down. As an extra precaution, check the caliper bolts for tightness - you might be surprised to find they need a slight adjustment.
Safety Check
Just like with the rear brakes, don't forget the final crucial step: spin the front wheel and pump the front brake several times until you feel a firm, solid brake response. This ensures your brakes are properly functioning before you hit the trails.
Conclusion
Replacing your dirt bike's brake pads is a straightforward maintenance task that makes a huge difference in your bike's performance and safety. While it might seem complex at first, following these detailed steps ensures proper installation and optimal braking power. Remember, proper brake maintenance isn't just about performance - it's about keeping you safe on the trails and track.
FAQs
Author information
My name is Charlie Frost, and I'm no stranger to the adrenaline-fueled world of extreme enduros. Starting my journey at 19, I seamlessly blended trials and enduro racing, honing my skills through youth events and extreme races like the Tough One and Erzberg. When I'm not tearing through rugged terrain, you can often find me in front of the 24MX camera, sharing my passion and insights with fellow riders, as we delve into the exhilarating world of off-road racing.