
How to change a Motocross Tyre
If you’re going to be changing the tyres yourself, you’ll need tools, a lot of patience and most importantly – a clear plan of what you’re doing.
Everyone is going to tell you to leave your tyres out in a sunny spot for 1-2 hours before working on them, so definitely do that. If you can’t count on the sun for help, put them next to a heater, or in your garage overnight. This buys you enough time to find the below items in your neatly organized hardware stash (or borrow them from your friends).
Not all of them are essential, but all of them will make your tyre changing life easier.
Products for changing tyres
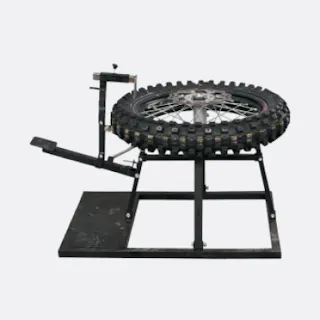


If you don’t have the tyre changing stand, make sure your wheel can rest on a soft surface, which will protect the brake rotor and sprocket. Changing a tyre is not more complicated than getting the old tyre and tube off the rim and reversing the process with your fresh parts. Sounds easy enough, but a lot can (and probably will) go wrong along the way unless you’re a tyre changing phenom. Let’s get into it.
How to change a Motocross Tyre
Changing tyres, step by step
Step one – Breaking the bead
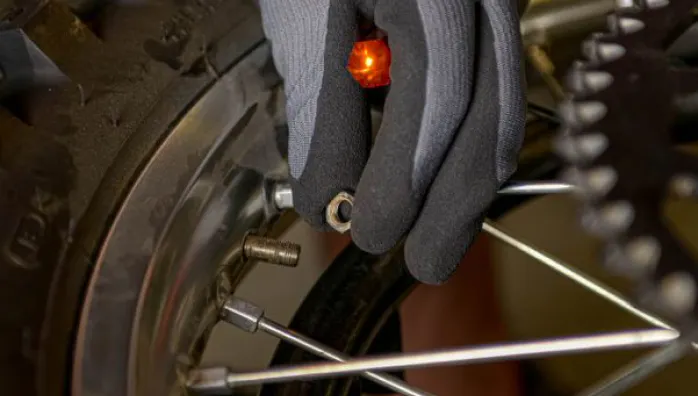
Loosen the rim lock and remove the valve core so the tube can deflate. Next you want to break the bead on the tyre. Push down on the sidewalls around the entire tyre on both sides to get it loose from the rim. If it’s really on there bad you could even stand on the wheel, using your bodyweight to break the bead on the tyre. Keep in mind that the harder your tyres are, the more difficult it will be to work on them. As rubber hardens with age this is another good reason to change your tyres in time. That way you won’t end up with that rock of a tyre that’s basically fused into the rim.
Step two – Starting to remove the old motocross tyre
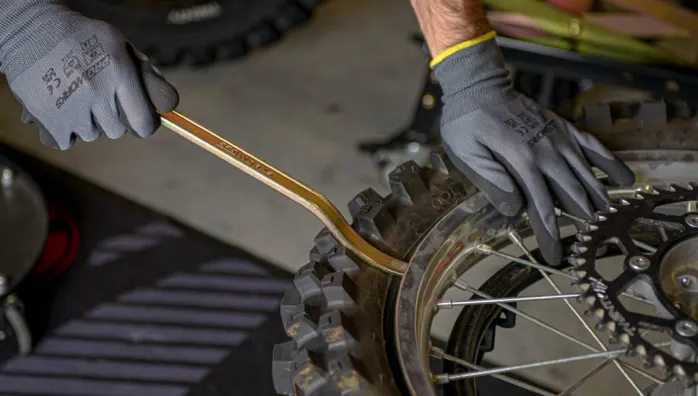
Using tyre lube makes the tyre come off easier. Generally, people will use any type of soap solution, but you could also get a commercial product purposefully made for tyres. Using your tyre irons, pull the tyre bead over the rim lip. Make your way around the entire rim. They key to doing this is to work slow and steady in small sections. Don’t go too deep past the rim edge with the tyre irons, you need to work methodically. The quality of the tyre irons really matters when doing this job. You want them thin at the tip to be able to slip them in where you need them to go.

Step three – Removing the tube and rest of the motocross tyre
Remove the inner tube. Be careful when you get to the valve stem and pull that one out carefully. Then start getting tyre off the rim. There are some different ways you could go about that, one way is flipping the tyre over and do what you did on the opposite side, pulling the lower bead over the rim lip. Once you get that going you should notice a point where it feels like you could start pushing the rest of the tyre off the rim with your hands.

Step four – Start installing the new motocross tyre
Now it’s time to install your fresh rubber. At this point you might as well do a quick inspection of your rims just to make sure there is nothing going on there that might cause issues with the tube. Also make sure you’re lining up your tyre in the correct direction. A directional tyre will indicate this by an arrow on the sidewall. Keep the sprocket side facing out and place the rim lock inside the tyre, keep the rim lock side on bottom for the rest of the process. Push the rim halfway inside the new tyre as far as it’ll go, apply your tyre lube and start prying the rest of the tyre on using your tyre irons. Again, take your time, slowly work your way around in small sections.

Step five – Fitting the new tube
The tyre is on the rim! Now you need to fit the tube. Start at the valve core and line it up with the hole in the rim. Push that through and feed the rest of the tube around. An important tip to remember is that the tube installs easier when it has some shape. So, try giving it a bit of inflation. This will also make it harder for the tube to get pinched when we install the new tyre. Another little tip you’ll hear is to use baby powder on the tube, which will also help reduce chafing and risk of pinching.
Step six – Finishing up and inflating
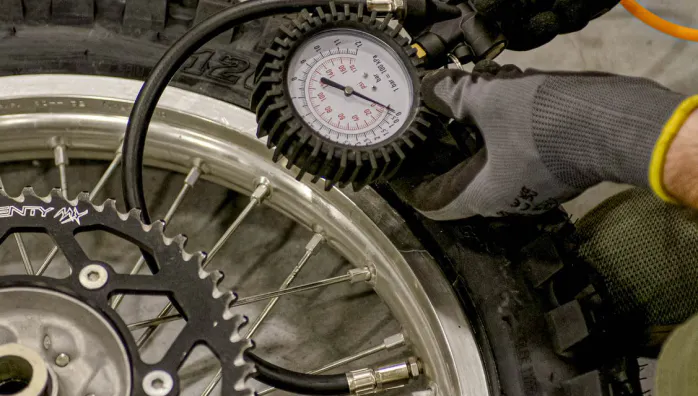
Now you’re going to be putting the tyre all the way on. This is where your inner tube can very easily get pinched if you aren’t careful. Starting opposite the rim lock, fit the other side of the tyre using both irons. On the final section, push up on the rim lock a couple of times before popping the last bit of bead over the rim to ensure it is moving freely and won’t get trapped. Reinstall the valve core and inflate the tube to about 12 PSI. For an average rider, on an average bike, on average terrain – you’re going to be good with that. Make sure the tyre is sitting properly on both sides, tighten the rim lock and reinstall the valve cap.

